Maintaining your Infratech heating element
Infratech Heaters pride ourselves on the high quality materials and advanced technology we use to create our products. After manufacturing commercial grade indoor and outdoor heating for over 50 years, we are industry leaders in research and development.
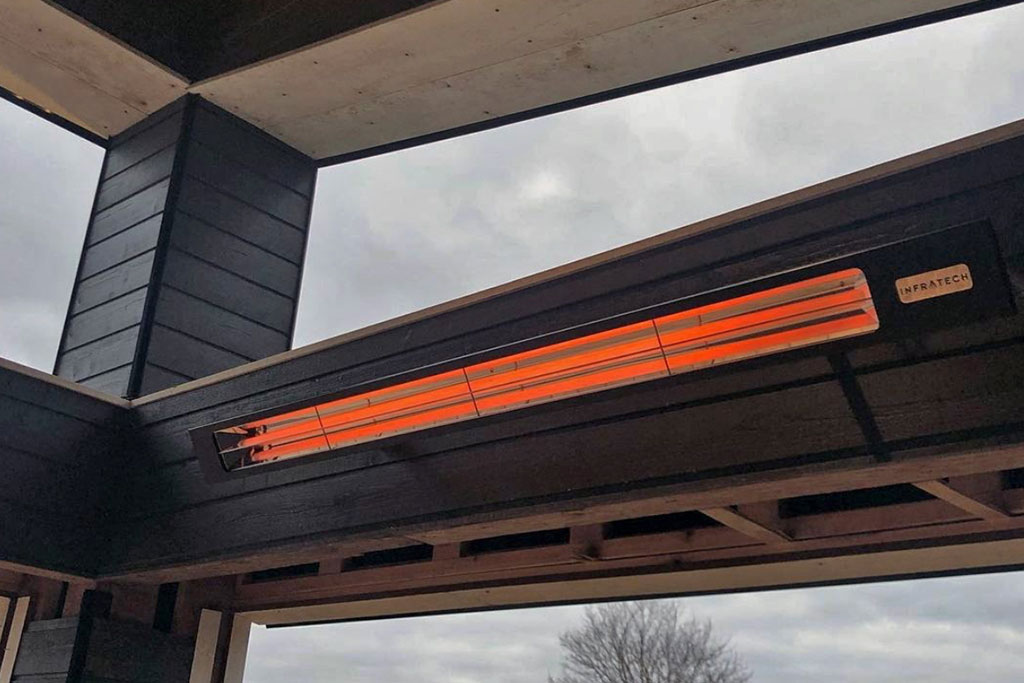
From being able to heat a backyard patio area to a holiday resort, Infratech Heaters use the very best materials to produce their award winning indoor/outdoor domestic and commercial heaters.
In this article we take you through how to replace the element for your S Series, W Series and WD Series Infratech heaters.
| FEATURE | CUSTOMER BENEFIT |
| All materials used in manufacturing 100% recyclable | No environmental impact |
| Quartz heating element | Long lasting, durable, safe |
| Produces no greenhouse gases | Another tick for the environment |
| Emits no ultraviolet light | No harmful UV radiation |
| Infrared technology | Even heat distribution that only heats surface areas (objects and people) not the air |
| Radiates a high-low glow | Creates a low light, not a bright harmful light that is unpleasant to look at |
| Produces 90% efficiency | Most effective and inexpensive form of heating |
| Install indoors or outdoors | Have quality heating throughout the entire house |
How to replace an SL Series element
- Disconnect the power to the breaker
- Assemble appropriate tools for installation
- Remove the 2 screws from the decorative side of trim. Then life up the trim and slide it over to release the front panel
- You need to remove the grill. To do this, lift the grill in the middle, flex it up lift it off
- Use a Phillips head screwdriver to remove the two end reflectors, release the retaining clips. Now you can lift the element out
- Use the 11/32 nut driver to loosen the nut on the end of the element. Now detach the remaining ring wire from the element. Once you have done on one side, repeat on the other side of the heating element
- Now it’s time to replace the old heating element with the new heating element
- Once the element is in place, reattach the ring terminal to the element and start rotating the outer nut with your fingers. Hold the ceramic cap with your thumb near the ring terminal so it doesn’t rotate
- Rotate the nut with the 11/32 nut driver. Repeat this step on the opposite side
- Now you can reset the heating element in the groove and lower the retaining brackets. Repeat this on the opposite side
- Replace end reflectors and reattach 2 screws on each side of the reflector
- You can now replace the grill on the heater. Start by seating the grill on one end, then flex up the middle of the grill in order to seat it on the other side of the heater
- Replace the decorative trim by placing it over the unit, then slide it sideways and down to lock it in place
- Now you will need to replace the housing capture brackets by placing them inside the trim
- Reattach the two screws that secure the two screws into the capture bracket
How to replace a W & WD Series element
- Disconnect the power to the breaker
- Assemble appropriate tools for installation
- You need to remove the grill. To do this, lift the grill in the middle, flex it up lift up and slide the tabs out
- Remove the two end reflectors by removing the two screws securing them to the heater
- Remove the screws on the retaining clips on each side of the heater. Release the retaining clip on both sides. Now you can lift the heating element up and out
- Use the 11/32 nut driver to loosen the nut from each end of the element
- Now you can replace the old heating element with the new heating element
- Once the element is in place, reattach the ring terminal. You’ll need to replace the outer nut to secure the ring terminal to the element. Start by hand tightening the end of the nut and finish with the 11/32 nut driver
- Now you can close the retaining clips on both sides of the heater and reattach the screw
- Now reattach the end reflectors by reattaching both screws to each reflector, repeat this step on the opposite side of the unit
- Now you can replace the grill. Start by seating the grill between the reflector and the heater housing on one side. Next flex up the middle of the grill in order to seat the tabs to the opposite side of the heater
Congratulations! You have now replaced your Infratech heating element